Secure and encrypted E-mail with self-generated Client Certificate
Step-by-step guide to secure your E-mail with self-generated Client Certificates
Step-by-step guide to secure your E-mail with self-generated Client Certificates
This tutorial will show you how to set up secure e-mail using S/MIME with a client certificate generated with BounCA. E-mail can be encrypted using the S/MIME standard. S/MIME stands for “secure multipurpose internet mail extension”. Normally, e-mails are send unencrypted over the web, which make them an easy target for cyber criminals. Normally you don’t consider it, when sending your photos, notary documents, financial information, and so on. Or consider phishing, the e-mail protocol doesn’t prevent identity theft. Just as physical mail, the sender information can be freely entered, and thus spoofed. Using certificates can secure your e-mail traffic, we will explain in this tutorial how to enable S/MIME.
We assume you have a working BounCA and create a certificate authority, see Create Root Certificate Authority.
First, you need an S/MIME certificate. Actually, that is just a client certificate with your full e-mail address.
Enter the dashboard of your intermediate CA which must sign your client certificate.
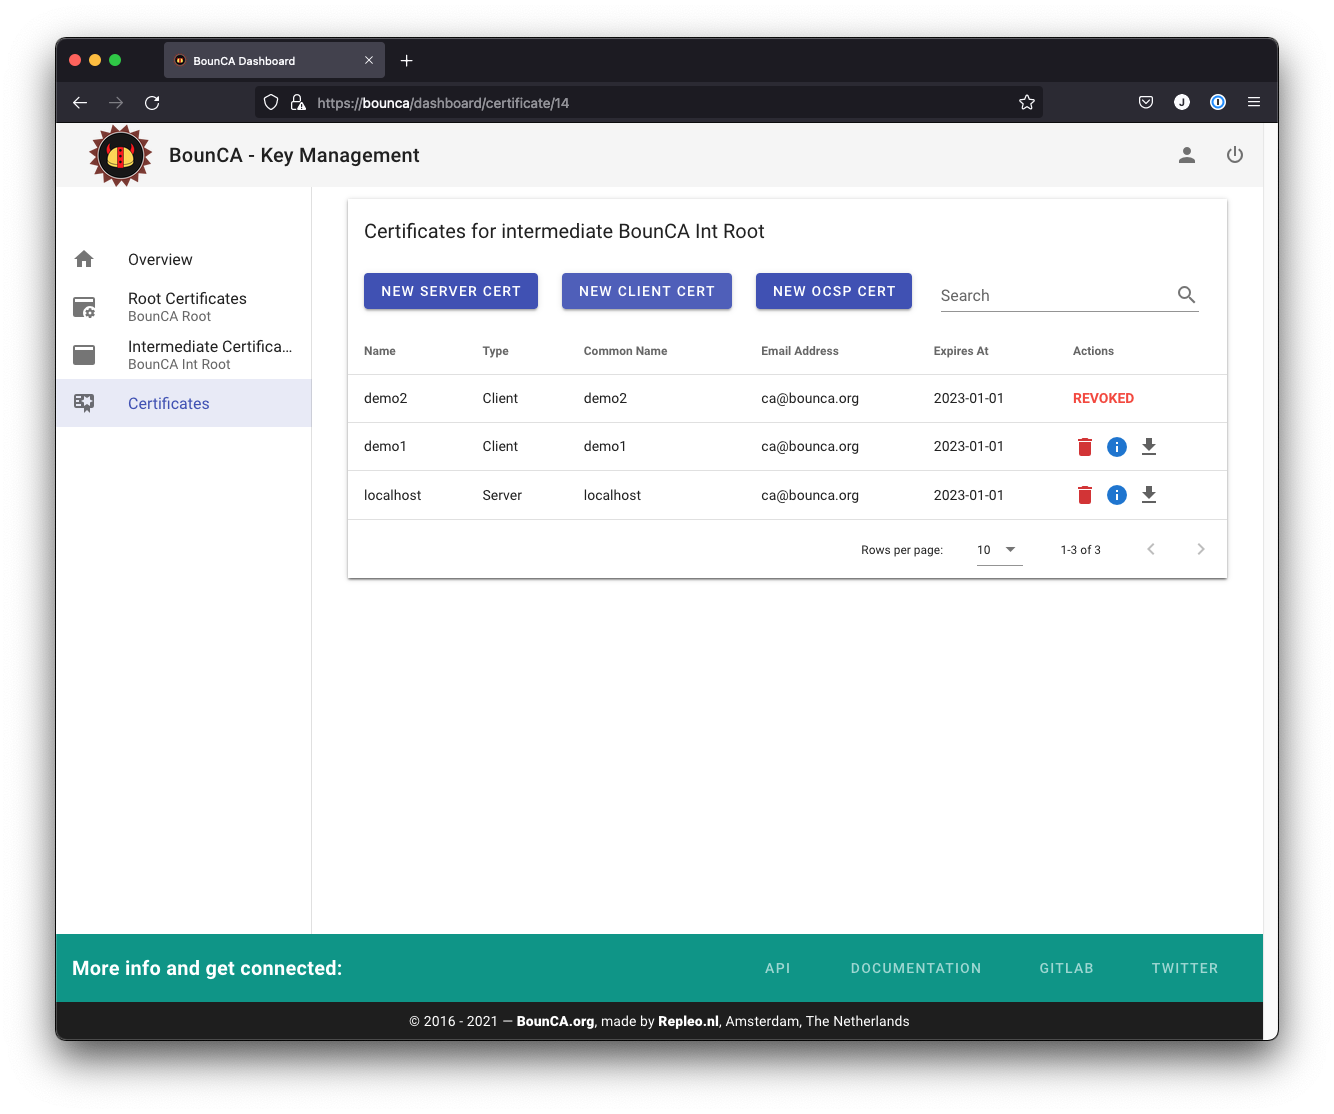
Step into intermediate certificate
Click on the New Client Cert button to add a new client certificate, and a form will be shown. The Common Name is your main e-mail address. You also need to add the e-mail address to the SubjectAltNames, and you can add extra mail addresses. Fill in the data for your client certificate. We use the Copy From Intermediate button to fill in the base information. Certificates are usually given a validity of one year.

Fill in the data for the S/MIME certificate
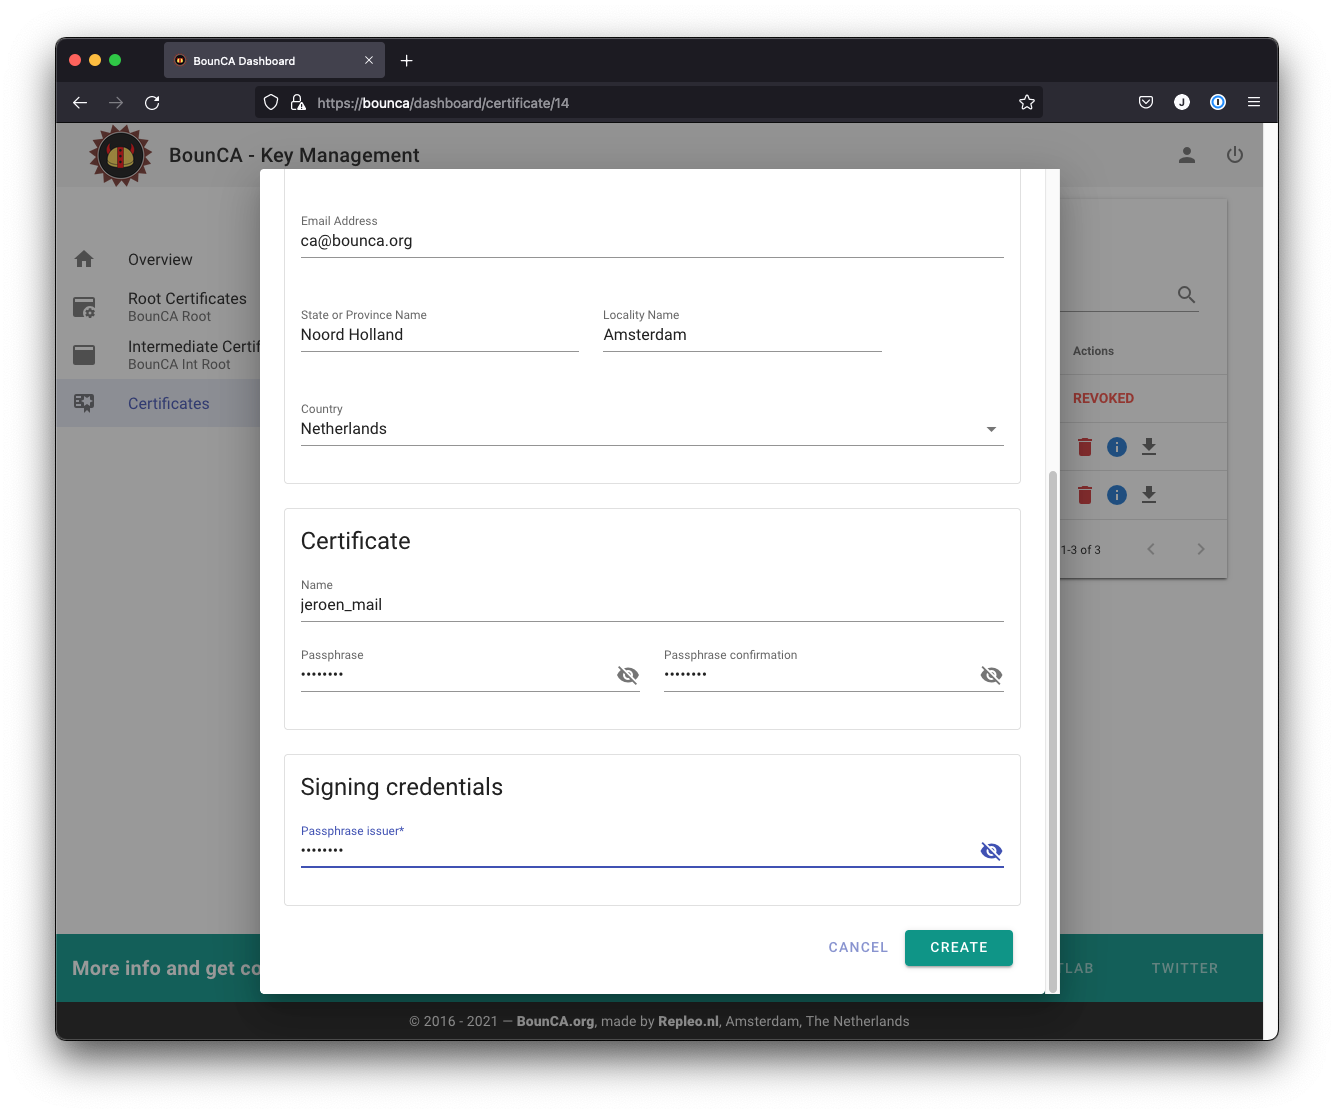
Fill in the passphrase
The passphrase secures your key. You should keep it secret.
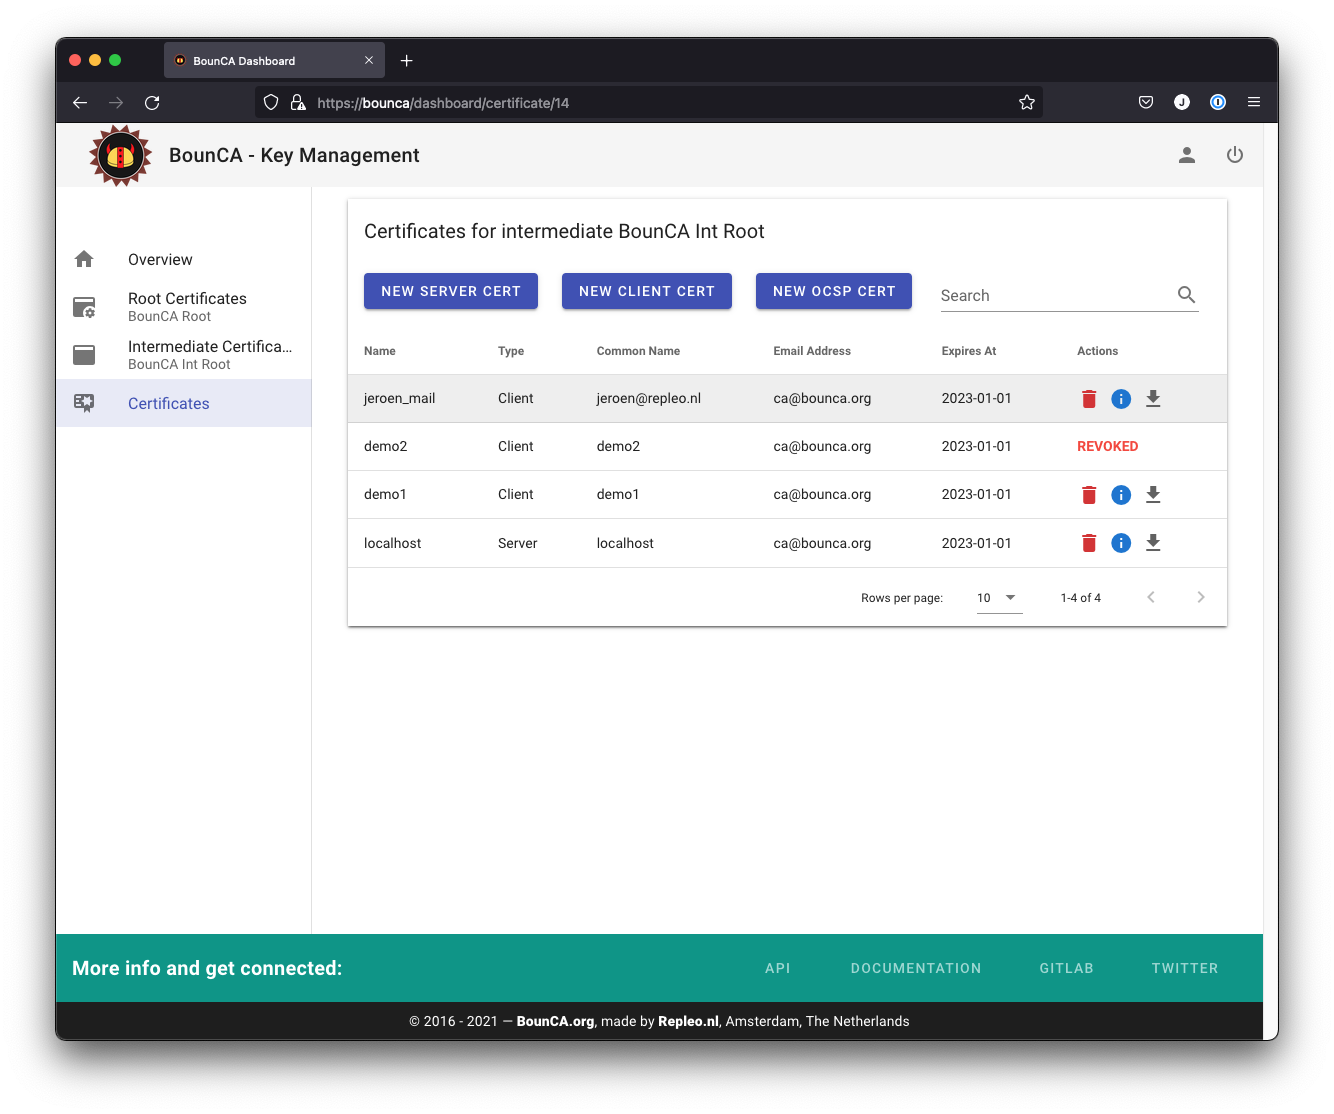
Generated S/MIME certificate
You can inspect the generated certificate
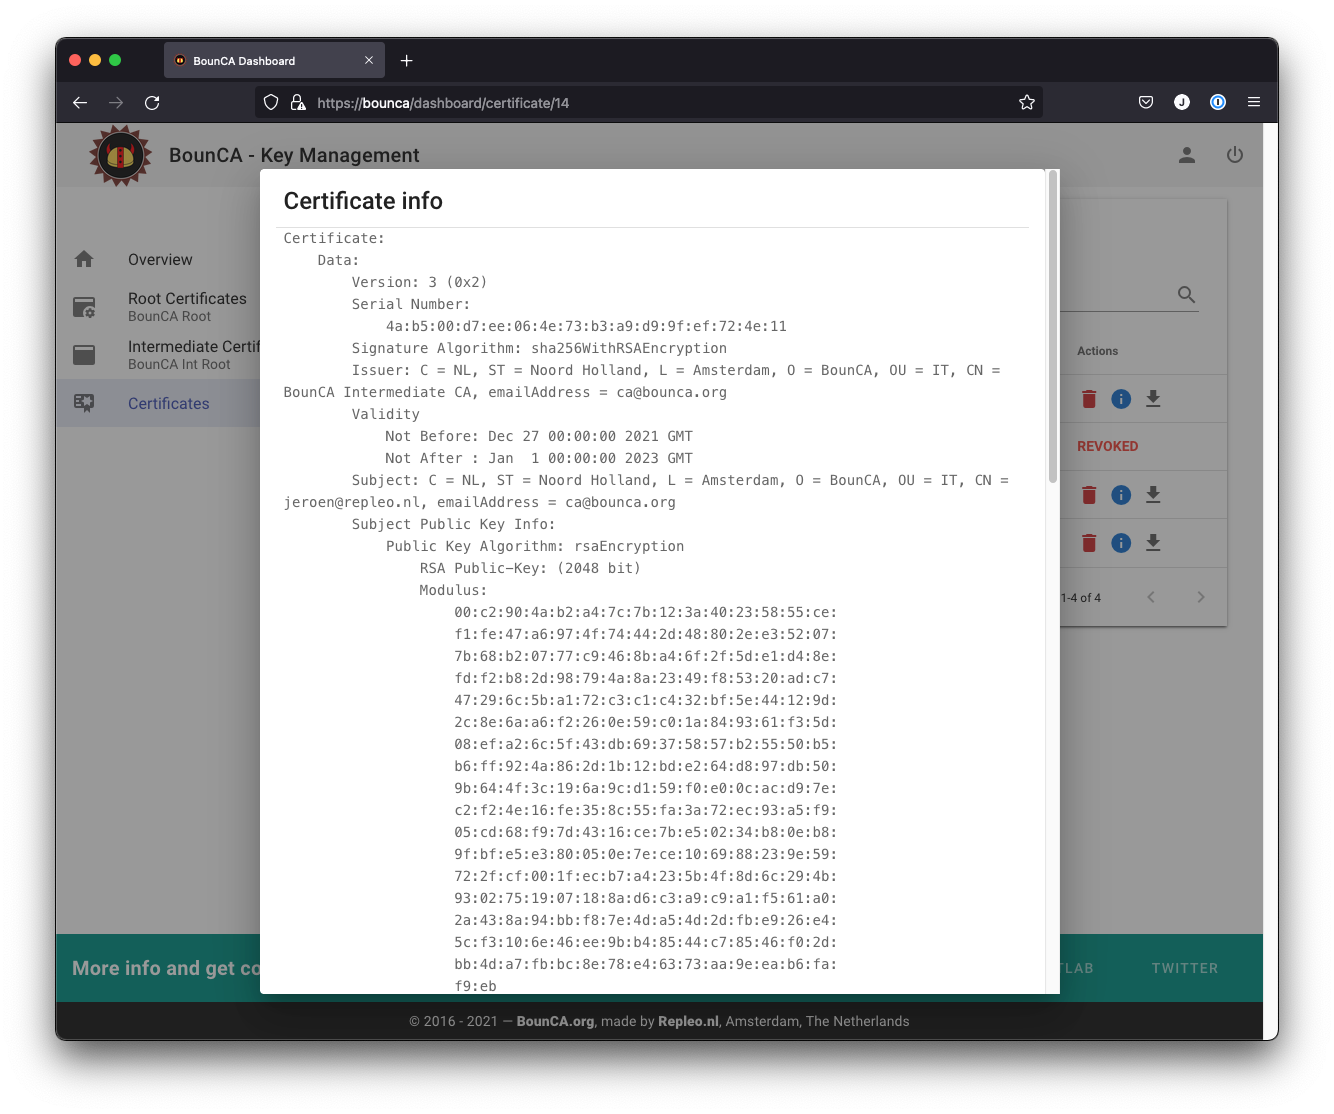
Inspect subject of the certificate
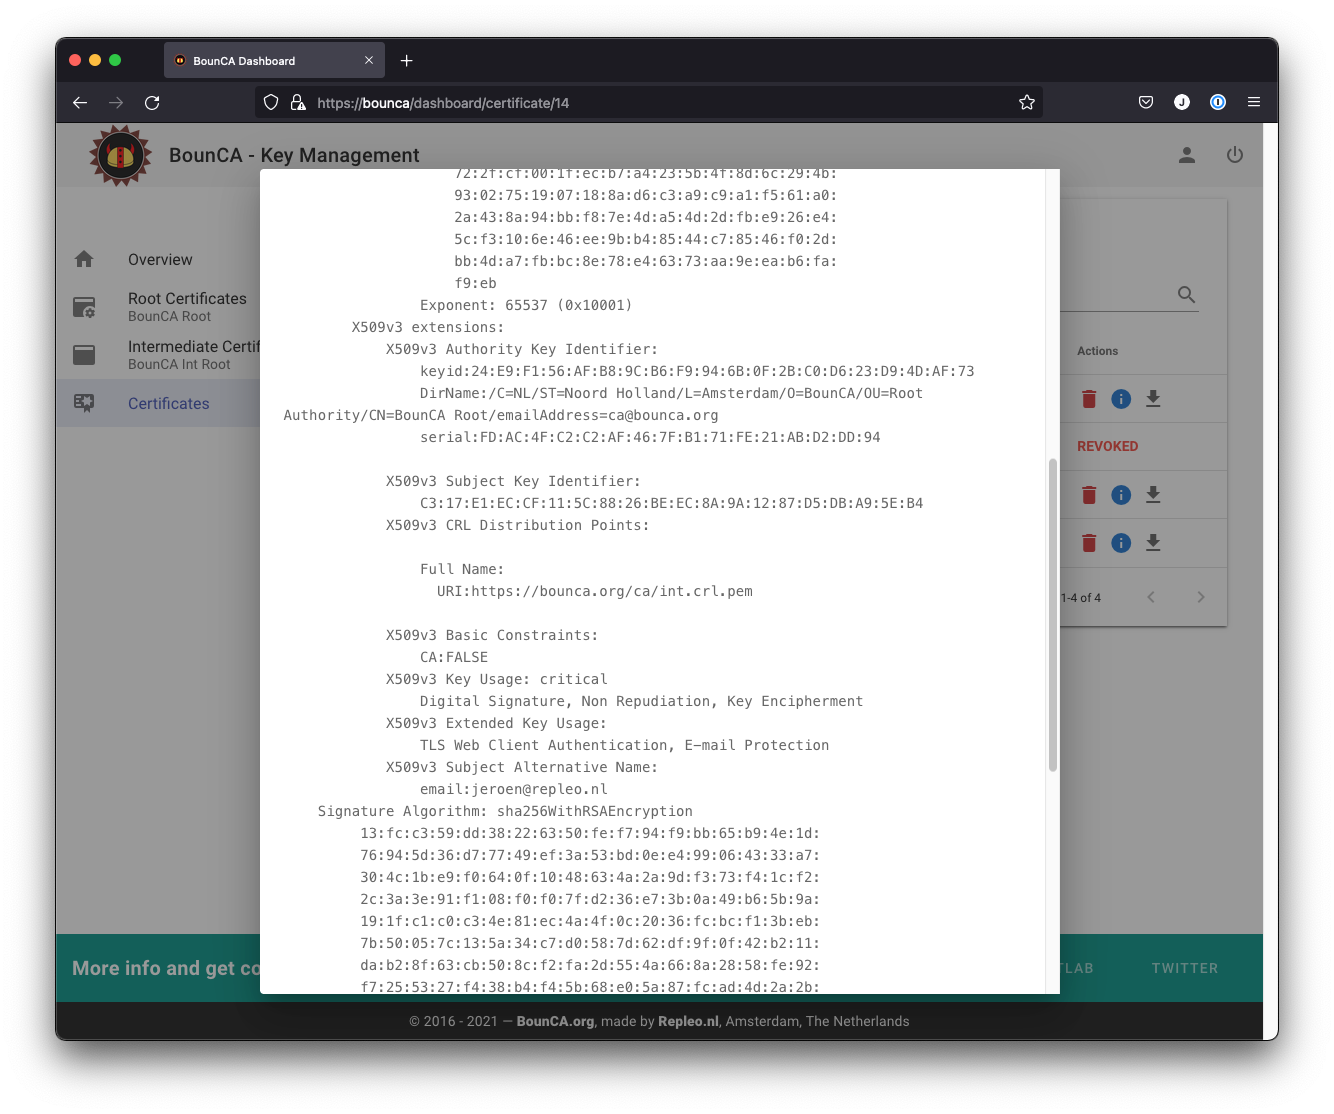
Inspect subject alt names of the certificate
Download the certificate bundle. It contains all files necessary for sending encrypted / signed e-mails.
In this section we will discuss how to send S/MIME mail with Apple macOS Mail, and Thunderbird. In general, you need to install the p12 bundle into your mail client, and receivers need to install the root certificate to be able to validate your signature.
First we discuss how to configure Apple macOS Mail. Install your client certificate by double clicking on the p12 file. Keychain will open, and ask for the passphrase. When you have entered it correctly, the client certificate is added to the keychain.

Install client certificate macOS
Open the Mail application, and create a new mail. We assume your mail address is equal to the one in the client certificate. You will notice Mail has detected your certificate and a certificate symbol at the right is shown in blue. Blue means it will sign your email, to disbale click on the symbol, it will be greyed out. The lock is for encryption, when grey, the mail will be unencrypted. The lock symbol will only be shown for installed public S/MIME certificates, and ofcourse for our own mail that certificate is included in the p12 bundle.
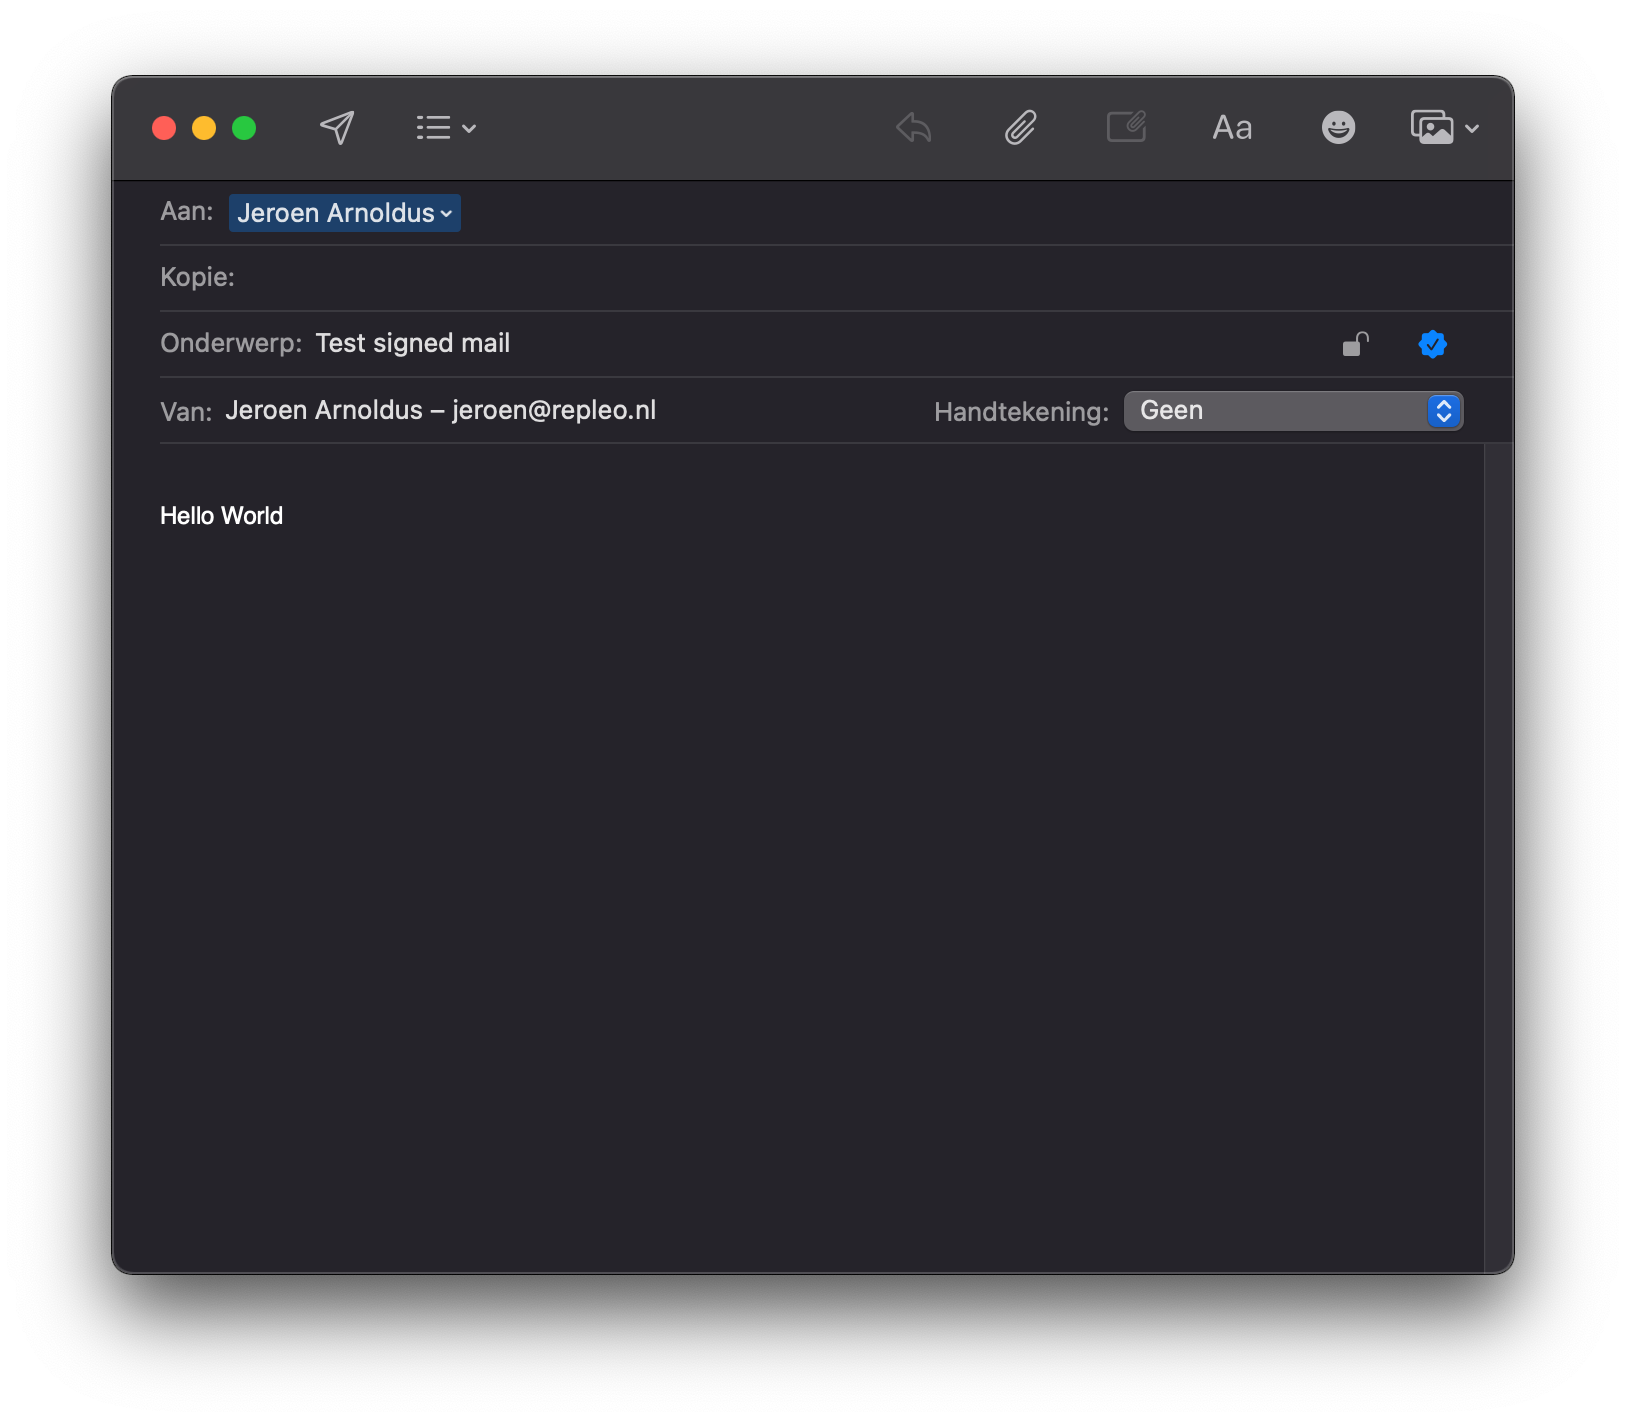
Create signed mail
After sending the mail to our self, we open it. When the mail is opened, it shows that the mail has been signed. You can see the trust chain by clicking on the certificate symbol.
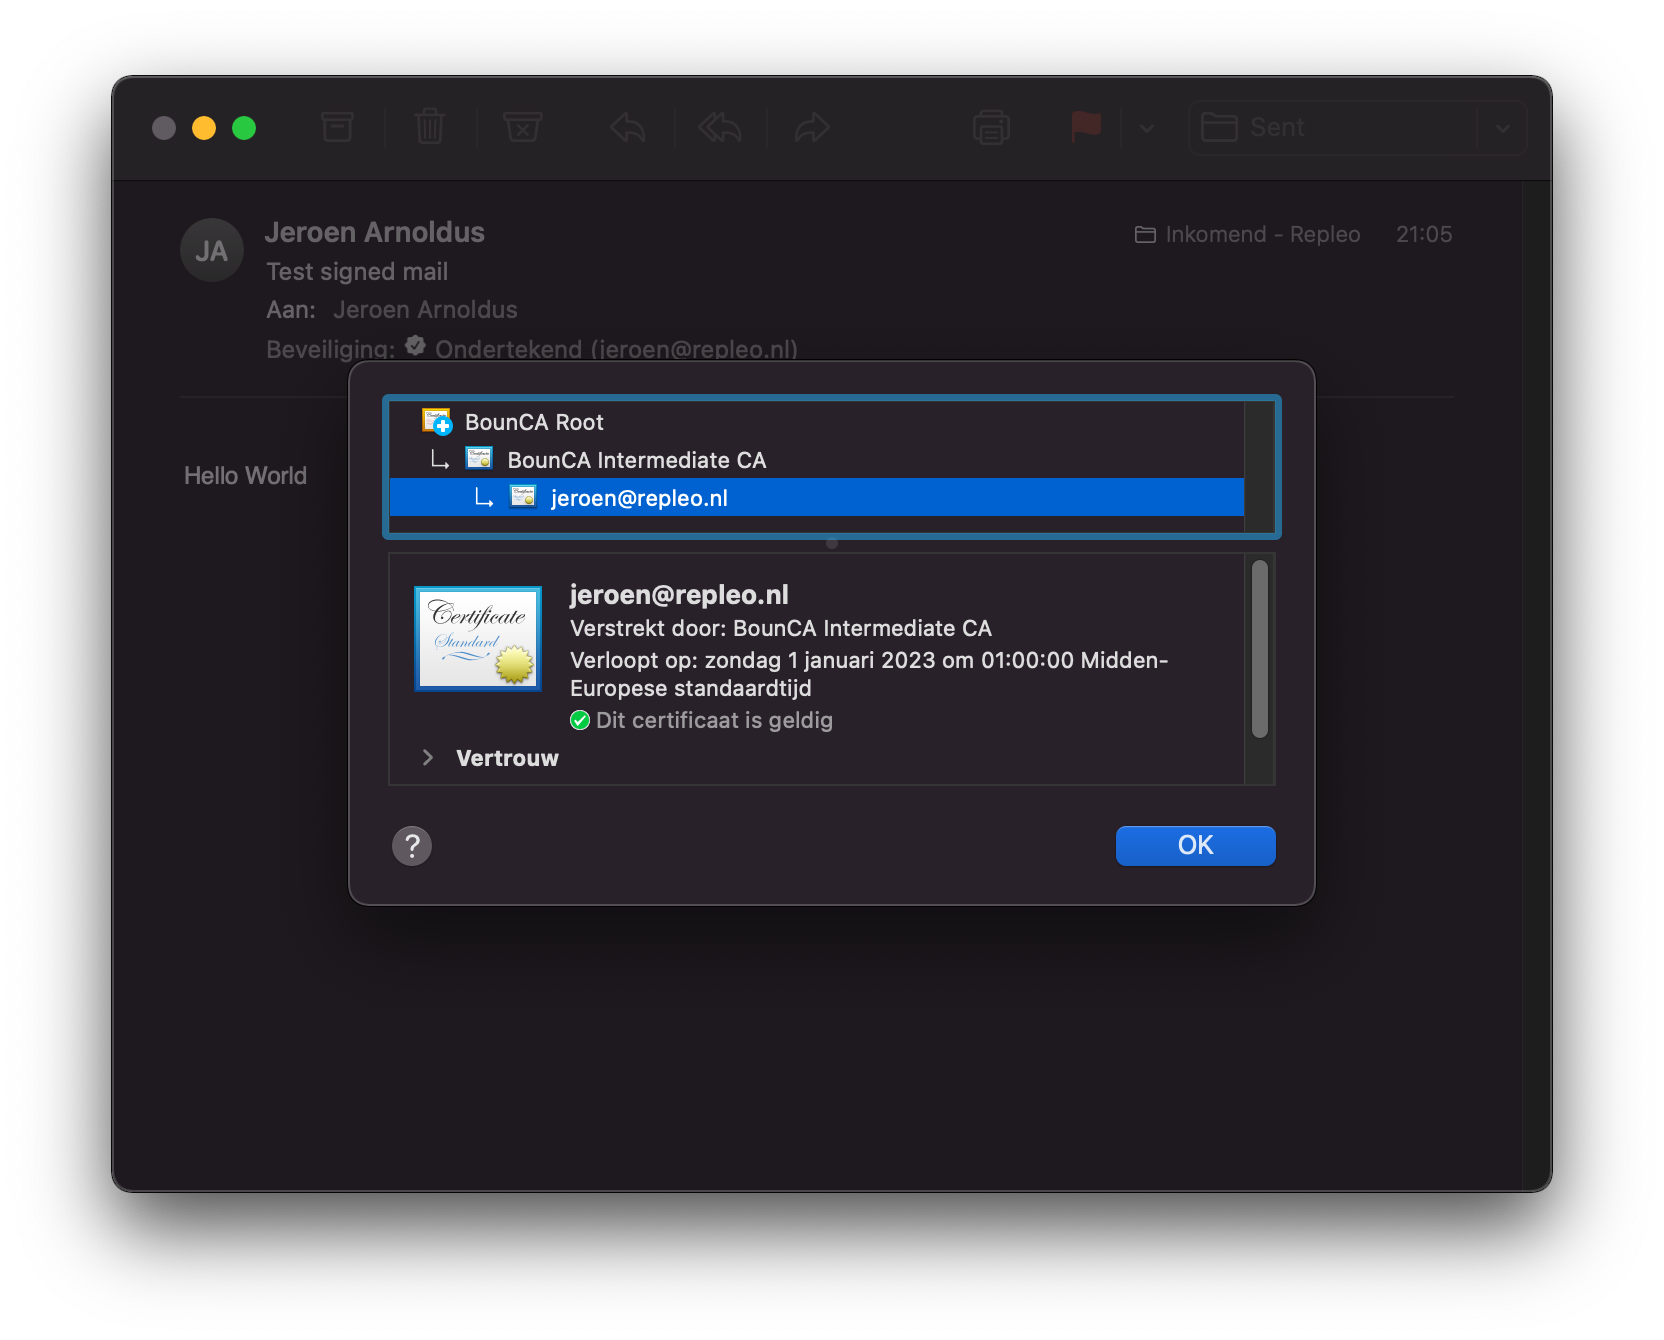
Receive signed mail trusted
When opening the same mail in Thunderbird, it shows a broken S/MIME verification. It is still untrusted. The root certificate of our CA needs to be added to Thunderbird to make the signature valid.
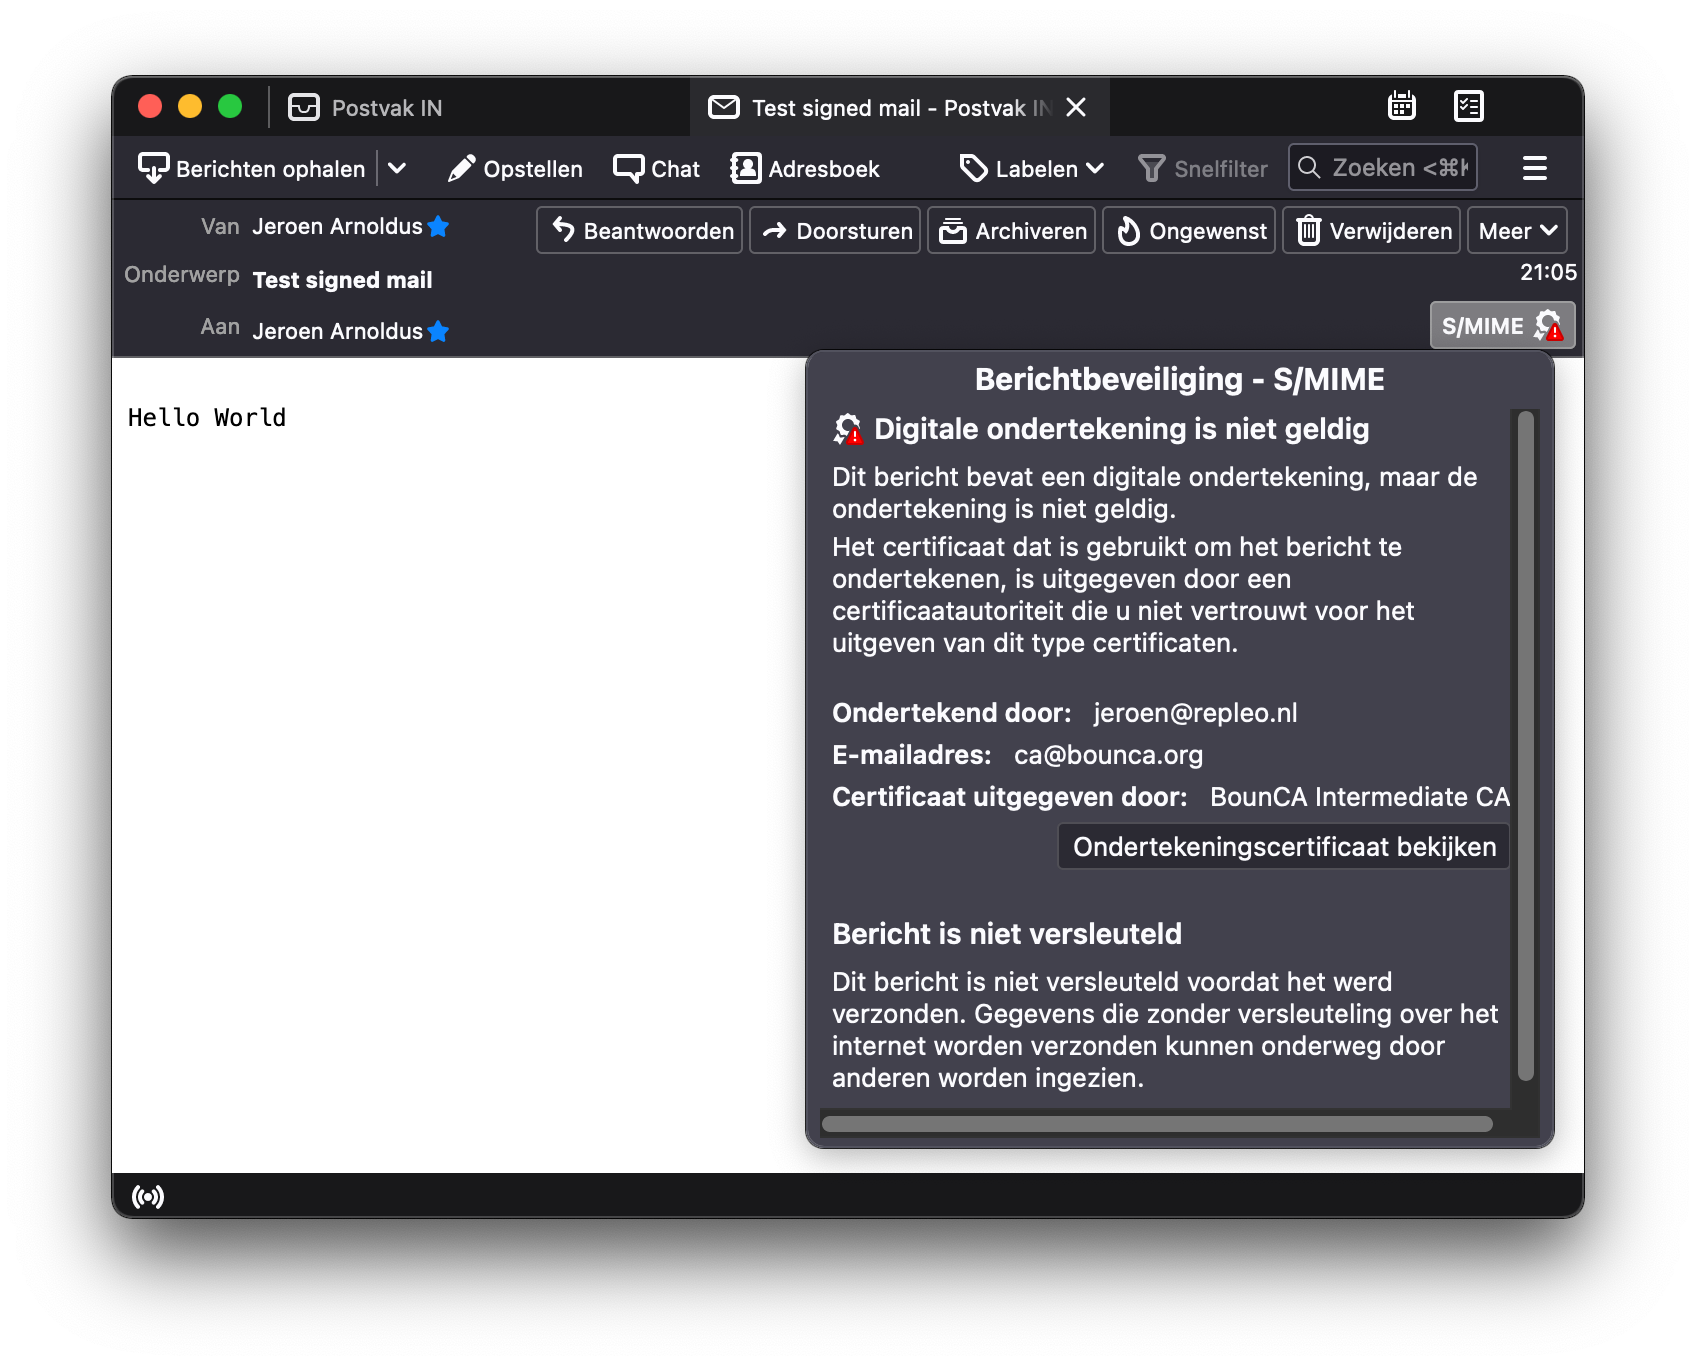
Receive signed mail not trusted in Thunderbird
Go to settings in Thunderbird, select the end-to-end encryption pane, and add the root certificate by pressing Manage S/MIME-certificates. Select the organisations tab to add the root certificate.

Add root certificate to Thunderbird
Trust the root certificate for sending e=mails.
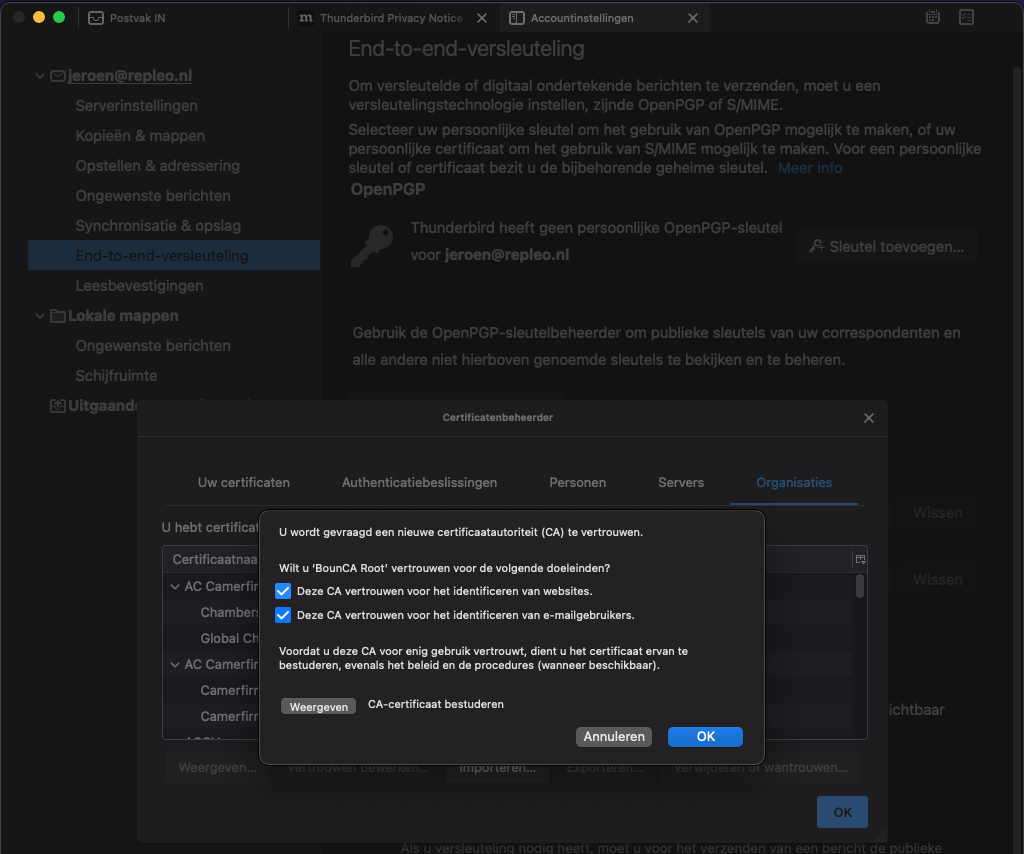
Trust root certificate in Thunderbird
When succeeded, go back to the received e-mail. Thunderbird will now show a valid and trusted signature.
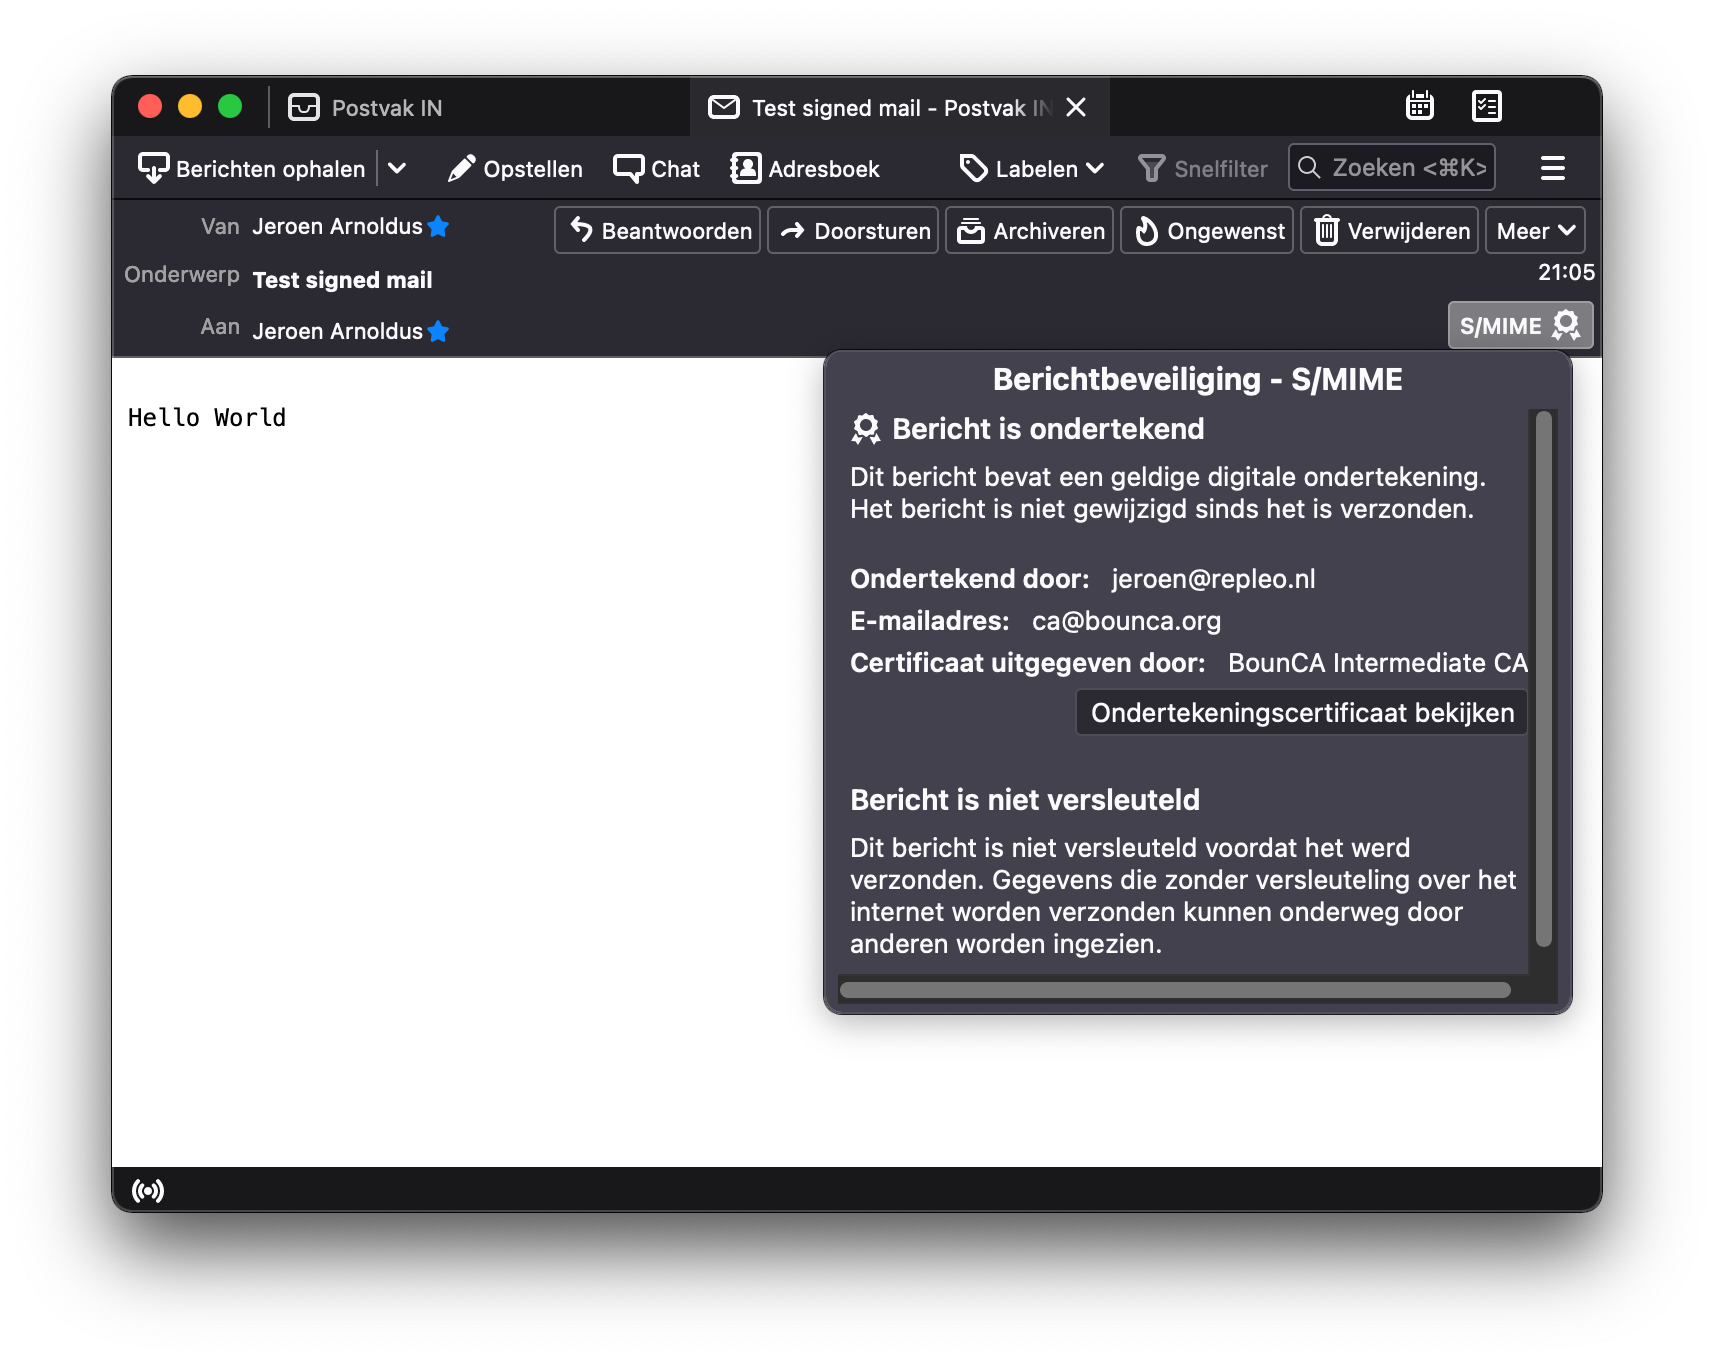
Receive signed mail trusted in Thunderbird
The S/MIME client certificate need to be added to Thunderbird to send signed e-mails. Go to settings menu, select the end-to-end encryption pane, and add the root certificate by pressing Manage S/MIME-certificates. Select the your certificates tab to add the S/MIME certificate.
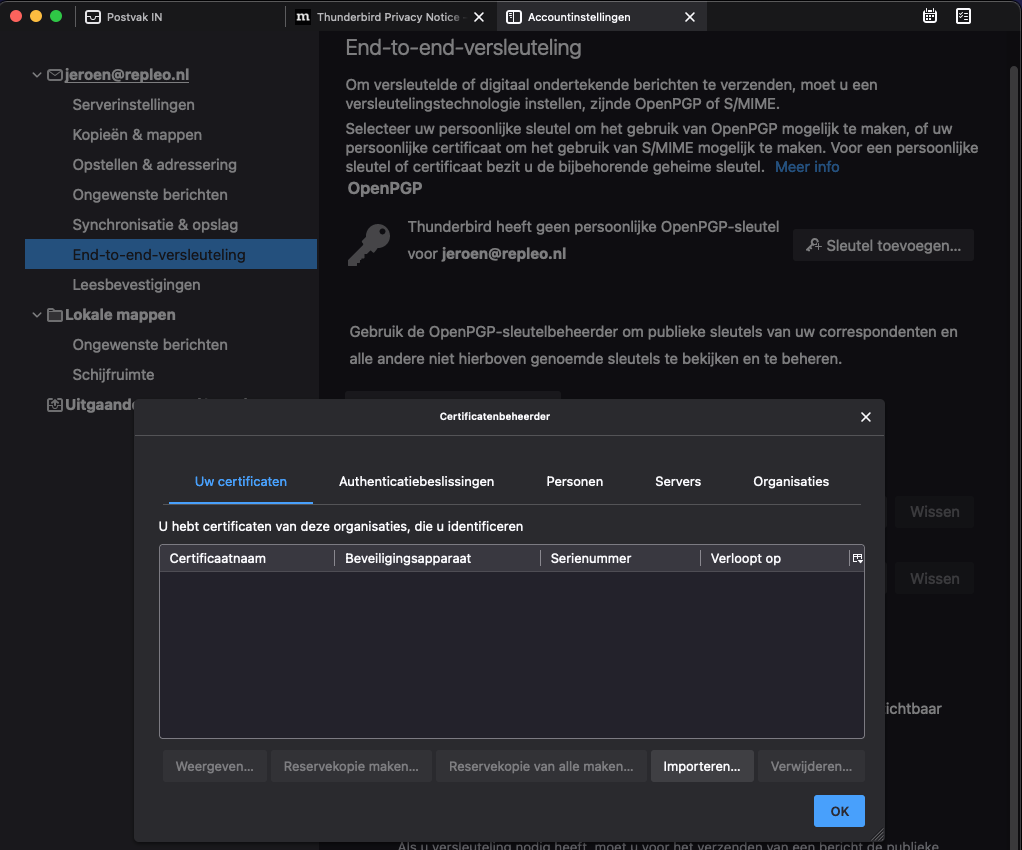
Select the your certificates tab
Press the import button and select the p12 bundle file.
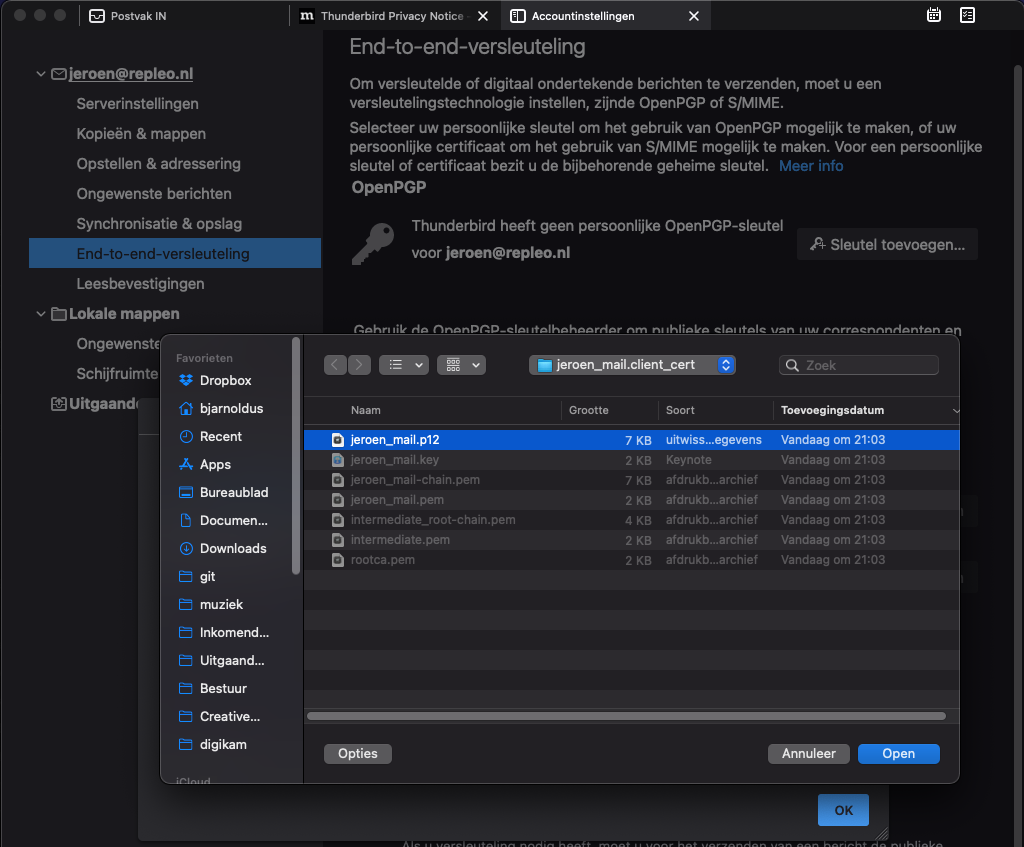
Select the p12 bundle
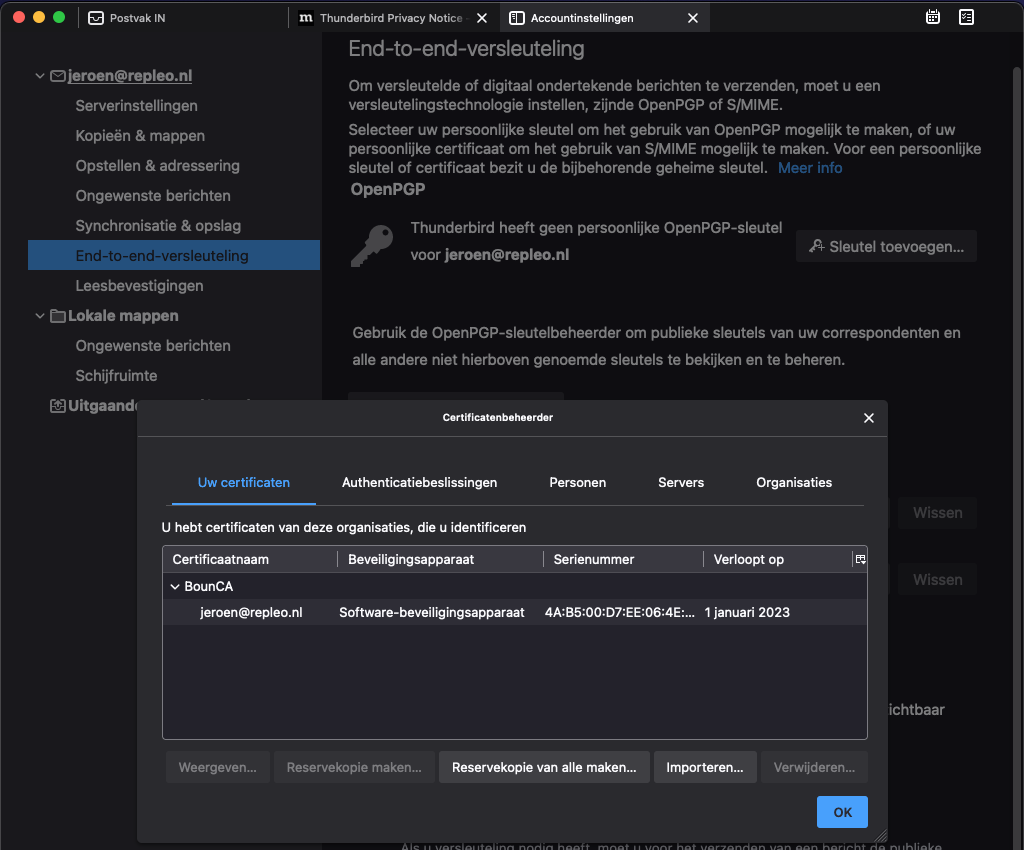
The client certificate has been added
The S/MIME certificate needs to be connected to your account. Press the select button of the personal certificate for signing field.
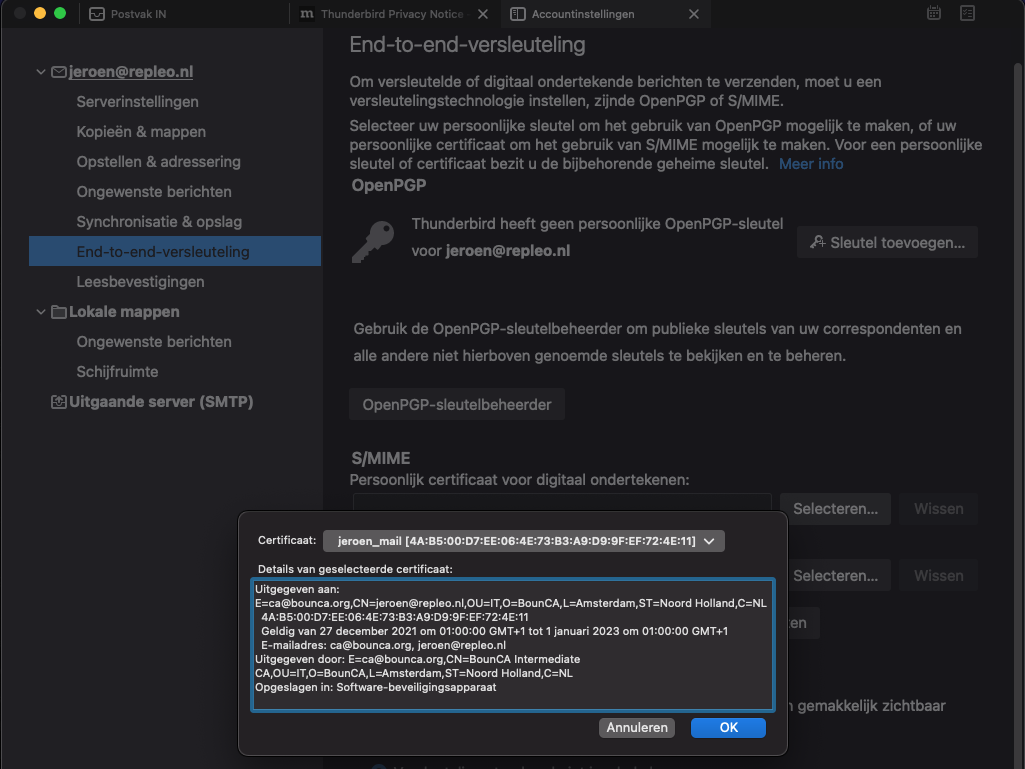
Select client certificate for signing
It will also ask to add certificate for encryption, answer positive on that dialog. You have configured the client certificate in Thunderbird. You might enable adding digital signature as default option, and turn off encryption by default.
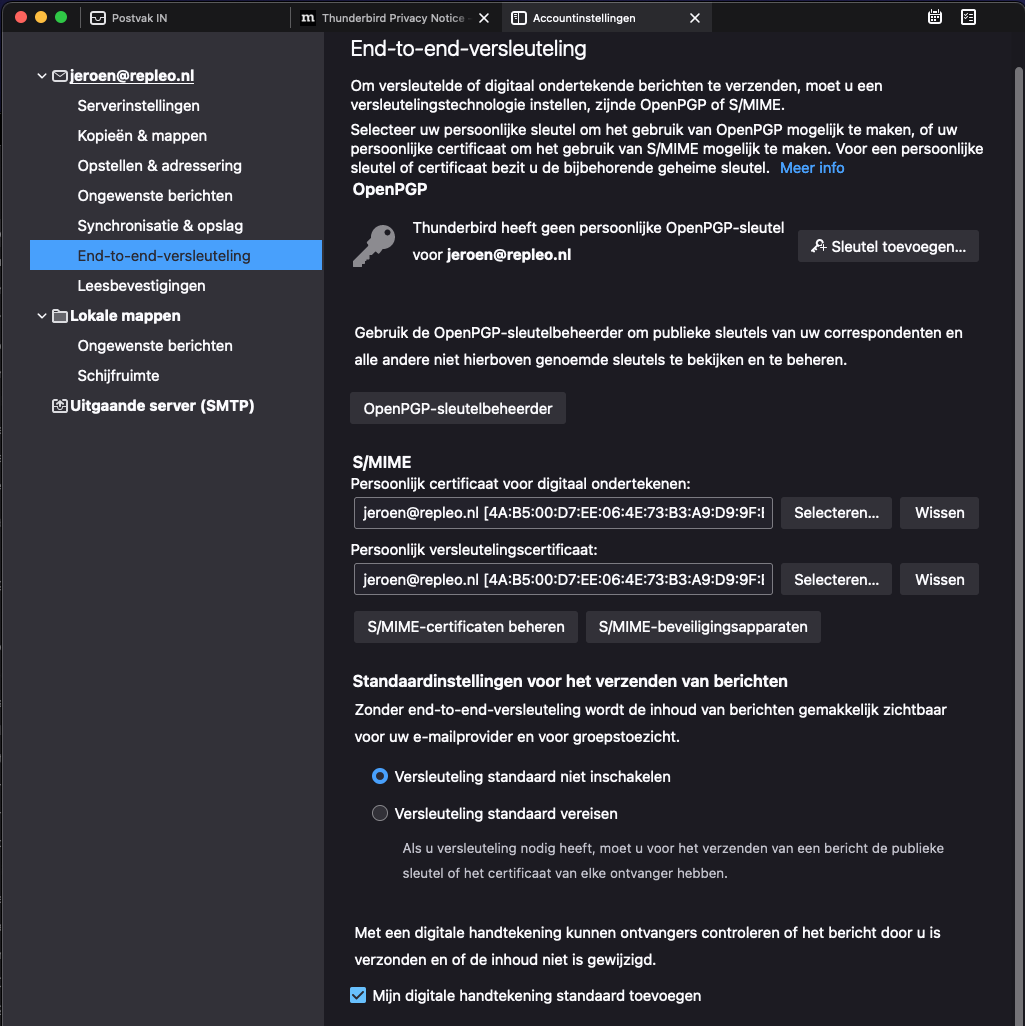
Client certificate for signing configured
Compose a new e-mail, and the compose view shows an extra security menu option.
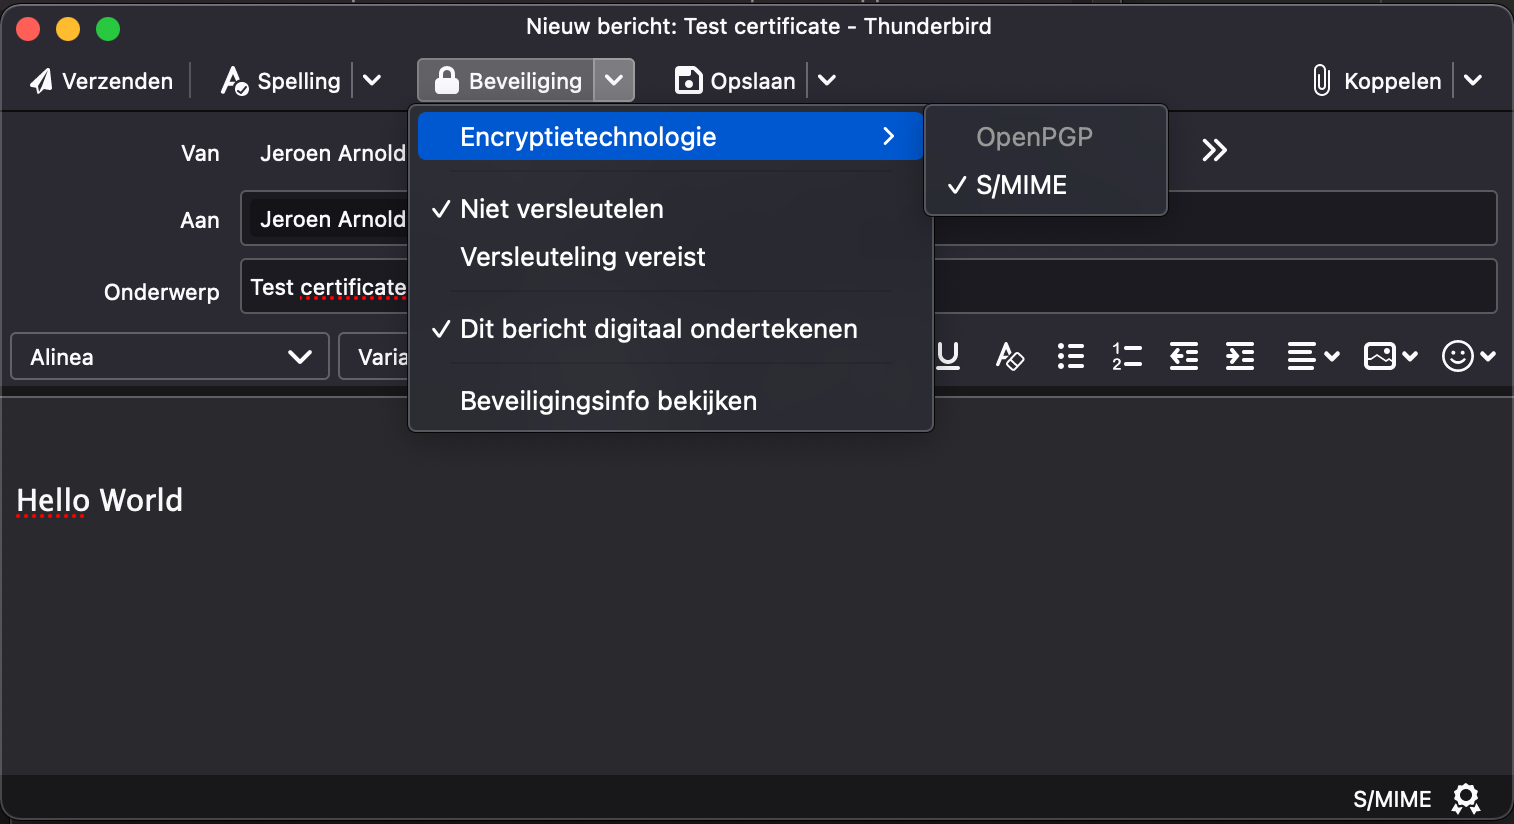
Send signed mail Thunderbird
The S/MIME certificate can also be used to encrypt the complete message. This enables end-to-end encrypted e-mail communication, and as we use a self-generated CA, harder to perform a man-in-the-middle attack.
To enable encrypted e-mail, you need to share your public certificate to your senders. Share with them your pem file and root certificate.
The senders of e-mails to your account need to install these public certificate.
If they have installed these file in their mail client, they are able to send you encrypted e-mails.
Ofcourse, you should never share your private key or p12 file, the private key is used for decryption and should only be known by you.
Create a new message in the Mail application, and click on the lock icon. The icon will become blue.
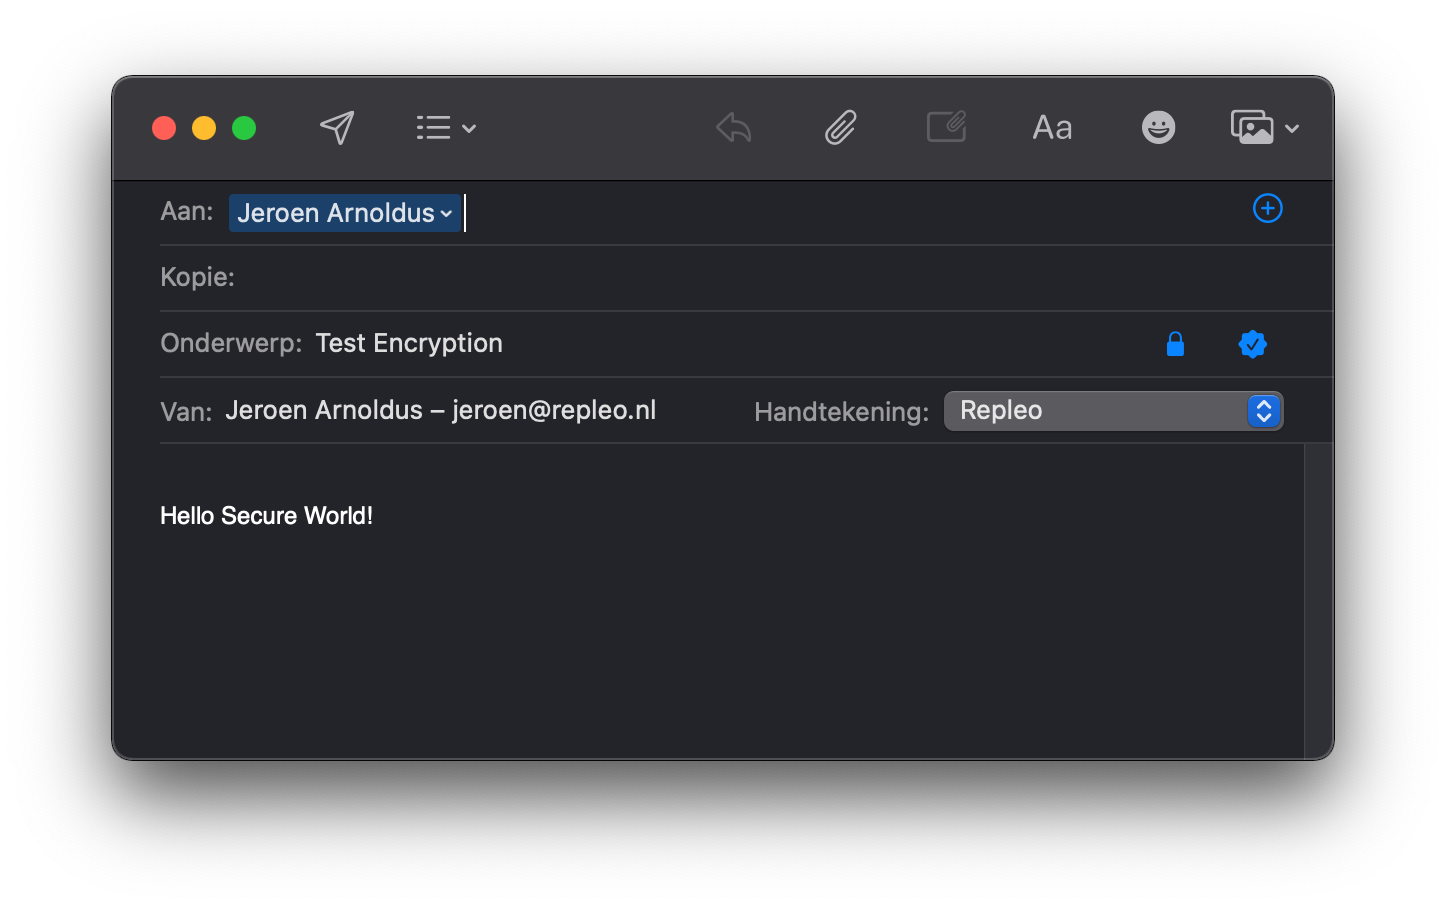
Send encrypted mail
When you open the mail in Thunderbird, you will be able to read it. You see the mail is encrypted by the icons in the top bar. And when clicking on the lock, Thunderbird shows that the message is encrypted.
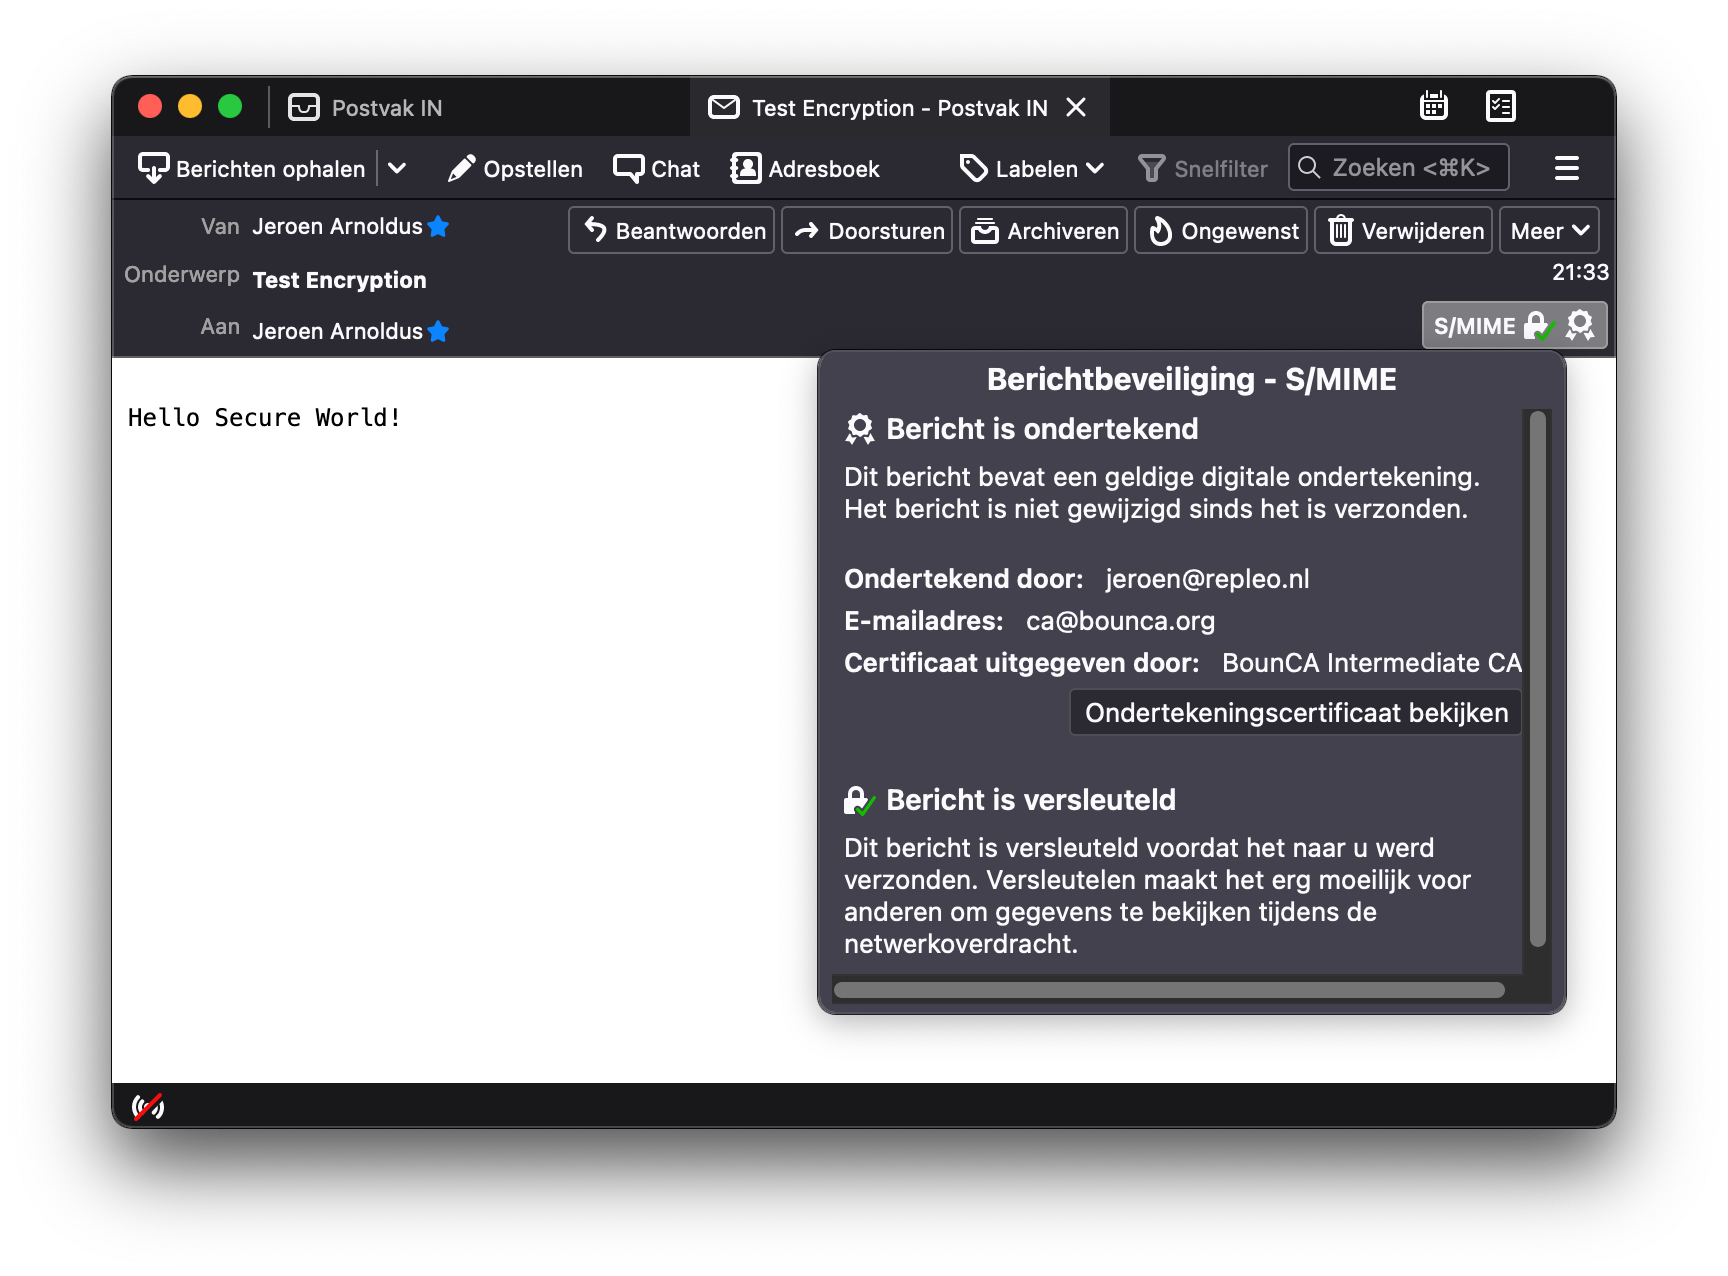
Received encrypted mail Thunderbird
If you don’t have the private key, you will not be able to read the mail. The only thing shown in that case, is a S/MIME attachment.